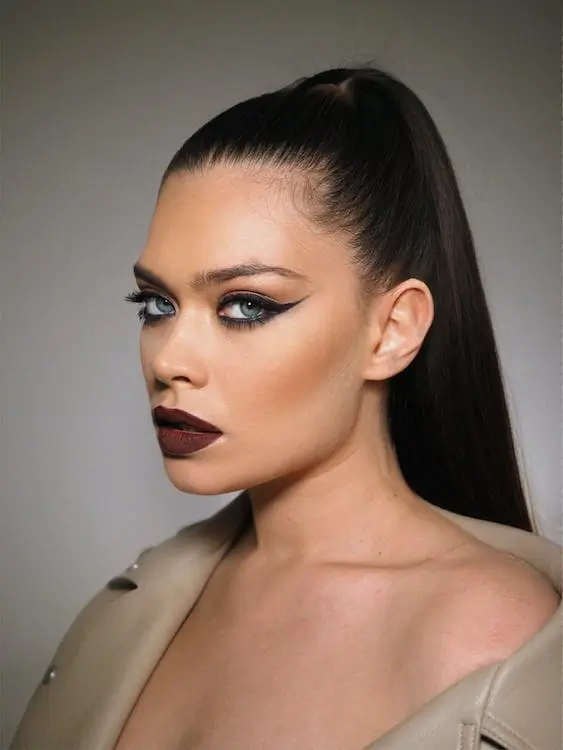
Winged eyeliner is an iconic beauty look that has been around for decades. It’s a classic, timeless style that can be worn day or night and adds the perfect finishing touch to any makeup look. While it may seem difficult at first, creating a perfect winged eyeliner can be easy with these 11 simple steps available in this article.
What Is Winged Eyeliner?
Winged eyeliner is a type of makeup look that consists of two distinct wings extending from the outer corner of each eye.
The winged eyeliner look can be created in different ways, depending on the desired effect and an individual’s style preference. This classic makeup trend has been around since the 1920s and continues to be popular today for its dramatic flair.
The first step in creating this classic makeup look is having all of the necessary items on hand. This includes an eyeliner pencil or liquid liner, eyeshadow primer, an angled brush, and black eyeshadow for added definition if desired.
Also, concealer or foundation can be used to help create a crisp line that won’t smudge throughout the day.
A winged eyeliner look may look like a professional thing, but with the right technique and practice, even beginners will be able to create beautiful winged looks in no time. Here is a step-by-step guide on how to do winged eyeliner for beginners.
To ensure that your liner stays in place all day, start with clean skin and a primed eyeshadow base. Listed below are some other tips.
- Start by using an eye primer before applying your liner—This will help keep the product in place and prevent smudging throughout the day.
- Choose an appropriate liner—Liquid liners work best as they give you more control over creating precise lines than pencils or gels do. However, if you’re not cool with liquid liners, then opt for something easier like a kohl pencil instead!
- Begin at the inner corner of your eye and draw outwards towards where your brow ends. Use short strokes rather than one long line so that it looks neater when finished.
- Use tape or another straight edge, such as a business card held against your lash line, to ensure even wings on both sides of your eyes. This will help create symmetry between both wings and make them even more precise when you draw them on later.
- Once all of the materials are gathered together, start by applying small dots along where you placed tape earlier. Then connect those dots into one continuous line going up towards each brow bone area while keeping everything symmetrical between both sides of the eyes until the desired shape is achieved.
- Make sure you have enough product on each side before connecting them at their peak point near the eyebrow arch; this helps make sure there are no gaps between lines when blending everything.
- Soften any harsh edges with an angled brush dipped in setting powder or concealer. With this, it soften any mistakes made while drawing out the shape initially, so don’t skip this step.
- Set the entire area by lightly dusting translucent powder over top in small circular motions—this ensures longevity without compromising the intensity from earlier in the process (if desired).
- Complete the look using a few coats of mascara only on the bottom part of the lashes—this gives nice definition around the eyes as well as accentuates the length created by liner, giving the overall polished effect desired when wearing dramatic makeup, which looks like the classic cat-flick style we’ve been discussing here today.
- Don’t forget about your brows; fill in sparse areas, tint slightly darker, and match the rest of your facial features to better balance the composition of your entire face, while still looking natural but with a groomed finish every time.
- Finally, add some mascara if needed before removing any excess material from around the eye area using q-tips or makeup remover wipes.
Factors To Consider Before Attempting A Winged Eyeliner
Winged eyeliner is a classic makeup look that can add drama and sophistication to any outfit. However, creating this eye-catching style takes time and practice. Before attempting the perfect winged liner, there are several factors to consider to achieve the desired result.
The type of product being used
Liquid liners tend to provide more precision than pencils; however, they may require more skill as well as patience due to their tendency for smudging or fading quickly if not applied correctly from the beginning.
Gel liners, on the other hand, will offer an easier application process with less mess since they dry almost immediately after application. However, these products often lack staying power unless paired with an eyeshadow primer, which may not always give desired results depending on skin type or allergies associated with certain ingredients found in primers themselves.
Brush shape and size
Since different brushes come equipped differently based on their brand name, finding one that works best for you might take some trial and error before settling on one particular choice over another (e.g., an angled brush versus a flat-tipped brush).
Furthermore, choosing between synthetic bristles and natural ones could also make all the difference. So, it’s a good idea to do research before buying.
Skin type and desired effect
While pencils offer more control but require frequent sharpening throughout the application. Additionally, selecting an appropriate color such as black or brown will help create a bolder statement with less effort than brighter colors like blue or green, which require additional blending steps before they are set into place properly on your lid area.
Finally, it’s important to keep in mind how you want your finished eye makeup to appear. If you plan on wearing dramatic eye shadow looks, then opt for thicker lines of liquid eyeliner.
If you prefer softer looks, then pencil liners might be better since they allow easier blending capabilities with other colors used around them.
Conclusion
With just these few simple steps, anyone can master their unique version of winged eyeliner quickly and easily—all it takes is patience, practice, and determination. Don’t worry if yours doesn’t come out perfectly the first time; keep practicing until you get the hang of it, and you’ll be rocking dramatic cat eyes like a pro in no time.


